Shapes for Photoshop school. Curly frames, CSH and PNG files. How to add new
There is an interesting tool in Photoshop - "Free figure"... In practice, this tool is rarely used, but it still has a number of interesting features. In this tutorial, you will get acquainted with arbitrary shapes, and also learn how to add your own sets of such shapes to Photoshop on your own.
The toolbar has a group of homogeneous tools ( shortcut key U). This includes: rectangle, rounded rectangle, ellipse, polygon, line, and arbitrary figure.
There is a window on the attributes panel where you can select a shape from among the standard ones. To do this, you need to click on the small arrow to the right of the thumbnail. Take a look at the screenshots:

What is a freeform shape?
She is vector image, which means it has no size restrictions. Therefore, it can be stretched as much as necessary without loss of quality.
The shape does not have its own color (other than the one we choose before creating), volume, shadows, border strokes or anything else. In this it resembles a brush, where you set the color yourself, everything else will have to be completed on your own.

How to use?
To draw an arbitrary shape, select it from the drop-down list, then left-click in your open document and move the mouse to the side. You will see that the outline of the future shape appears. By moving the mouse in different angles and directions, you adjust its size and shape, i.e. it can be wide or narrow. Do not forget to choose the desired color first, and then paint.
Pinch Shift key to draw the shape perfectly flat, without distortion in any direction.
How to set your shapes in Photoshop?
You can independently install a set of shapes in your program. The same principles work here as, for example, with or. To install them, first, download a set of shapes to your computer. Such sets have the extension csh.
After that, open the shapes menu. You will see 4 commands like this:

By choosing "Download ...", a dialog box will open in which you need to specify the path to the file with the extension csh, for example like this:

This set will automatically be added to the end of the list of all shapes. Let's say you had a set with animals in the list, and you downloaded the arrows. The end result is a list of animals and arrows.
By choosing "Replace ...", everything will be the same, except that new figures will not appear at the end of the list, but will completely replace those that already exist. For example, you initially had sets with animals and arrows loaded in the list, and you decided to open with replacement set of ornaments. As a result, only ornaments will be on the list.
And if you downloaded multiple sets, deleted any individual shapes using the command "Delete…", in general, made a set for yourself, then you can save it with the command "Save custom ..."... In the future, it can be downloaded in the same form or transmitted to someone via the Internet.
The last command "Restore arbitrary ..." allows everything to be returned to default.
Please note that in the same menu there is a huge list: Animals, Arrows, Nature, Objects, etc. it standard kits, which were kindly provided by the developers of Photoshop.
Second installation method with added benefit
Custom shapes can also be installed directly into Photoshop's system files.
It's a little more difficult to do this, but the main advantage of this method is that your set will appear in the list that I described above (Animals, Arrows, Nature, Objects, etc.). If you intend to use this tool often, then this installation method will reduce the time, and you can select the desired set in two clicks.
To do this, you need to copy the file with the extension csh v system folder photoshop "Custom Shapes", usually she has this address: C: \ Program Files \ Adobe \ Adobe photoshop CS5 \ Presets \ Custom Shapes.
If you spot an error in the text, select it and press Ctrl + Enter. Thanks!
1 voteHello dear readers of my blog. The easier the task, the more difficult it is to solve it in Photoshop. There are a thousand articles about or creating the effect of black eyes, but how to draw a circle, square or rhombus - go figure it out! Today I will solve this injustice.
You will find an exhaustive article about geometric shapes for Photoshop - how to draw them yourself, what additional tools can be downloaded for a more effective result, as well as many other equally interesting and useful information.

We draw ourselves
Adobe Photoshop has several tools that let you draw shapes. Here are just a few of them hiding some secrets. Now I will tell you about them. So, if you want to learn how to do as I have in the picture, then I recommend the article, there is nothing easier than doing the same.
So, in the toolbar on the left, you can find a rectangle, ellipse, polygon, line or arbitrary shape. Perhaps you do not see additional tools, but you found one of them, just hold down the left mouse button for a split second or click once on right button mice. A menu with additional shapes will appear immediately.

First, I'll select a rectangle. As soon as I finish painting, the left will come out extra menu... Here you can choose the size in width and height if you need to keep the exact dimensions. Slightly below is a menu with a fill for the shape itself - you can choose no fill, a solid color, a gradient or a pattern.
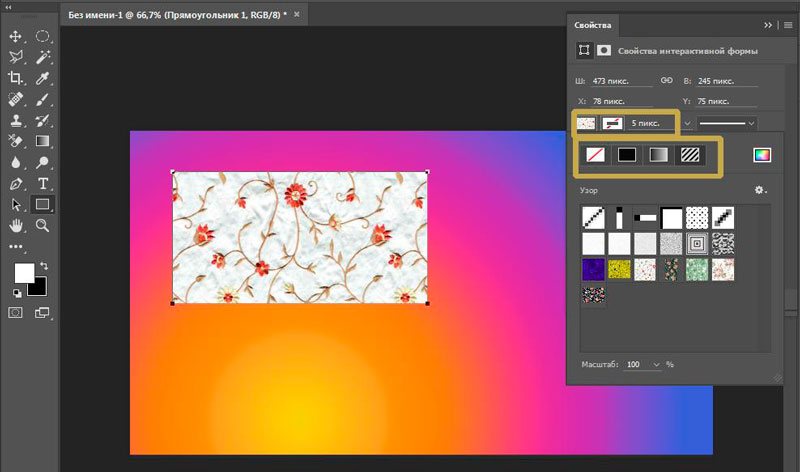
Slightly to the right is the stroke menu - you need to determine its width and whether it will be present at all, if you want it, make it monotonous, fill it with a gradient or, again, a pattern.

To turn a rectangle into a square, you need to hold down the Shift key while drawing the shape.

Holding down the Shift key turns the ellipse into a circle.

Also on the list is a shape such as a polygon. You yourself determine the number of sides. You can enter any value - 3 so that the triangle comes out, 7, 10, and so on.

I will not pay much attention to the lines; this thing is not difficult to figure out on your own. The only thing worth warning is that holding Shift makes the line strictly vertical or horizontal.
Arbitrary figure
We are left with an arbitrary figure. What it is?

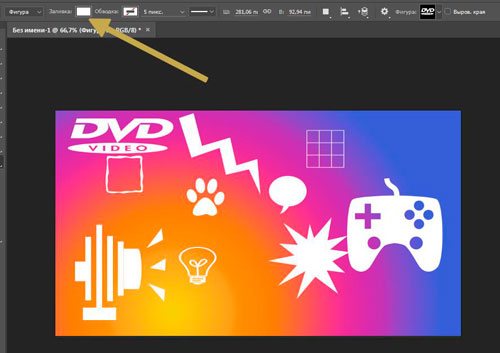
On the very right side of the top menu, you can see the finished shapes. Various arrows, squares, lightning and so on.

To use the keyboard shortcut Ctrl + T.

How to add new
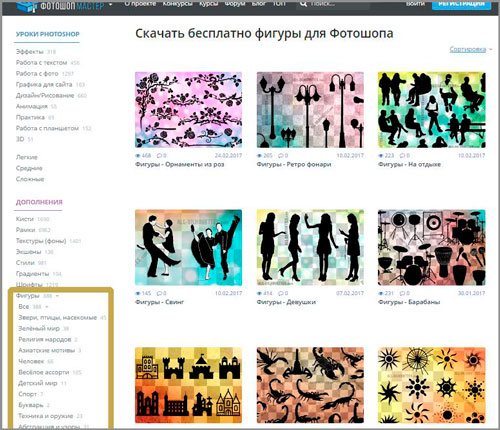
Adding new shapes is easy. A lot of free shapes can be downloaded from the site photoshop-master.ru ... There are about 400 sets with figures - people, patterns, spiders, abstraction, cars, chairs, fire, flowers and much more.
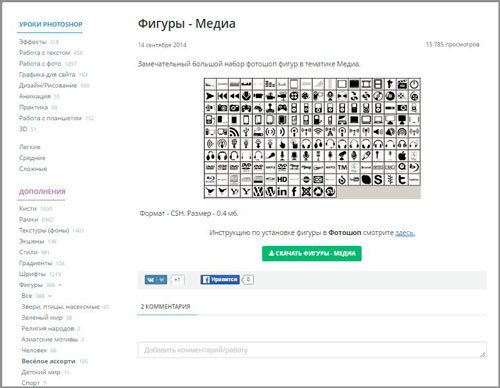
I'll show you how to install them using the example of "Media", they will be useful to me in the future. So, I'm downloading the file.
It is enough to wait 15 seconds. No prior registration is required.
Now open the archive and drop the CSH file where you can easily find it.

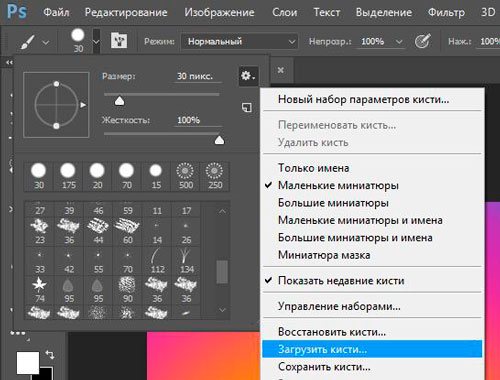
Now open the shapes in Photoshop and click on the nut on the right side. In the list that opens, select "Load Shapes".

Now find the file that you unzipped not so long ago. By the way, after you're done, you can delete the file from your computer. You won't need it anymore. Everything was copied to desired folder.

You can use shapes. Don't forget about the fill, thanks to which you can change the color of the shapes, as well as the stroke.
In addition to shapes, you can also use brushes. They can also be downloaded from the website Photoshop-master .

You can load the required set in the same way as when working with shapes. Open up the brushes.
Click on the nut and select "Download".
Work with them yourself. There is nothing difficult here. They are slightly different from the figures.

Google help
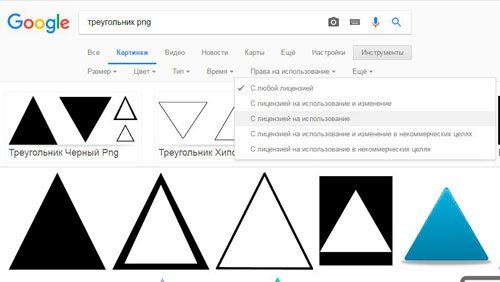
Another way to draw a figure is to use other people's labors. You will need Google and its Pictures section. Why exactly he you will find out very soon. So that the figure has transparent background, and she blended into your composition harmoniously, required. This is how you need to search: triangle png, circle, oval, and so on.

If you are doing work for yourself, then in principle, you could use Yandex, but if the project is created for commercial purposes, then Google will be very useful. Open "Tools", then "Use rights" and select the desired type - use or use and change.
Next, open the picture after you have found something suitable. This is an important condition. The drawing should be located on such a square-checkered background. If it's just white, then it's not png. You will understand the difference when you download. Basically, it's okay to learn from your mistakes.

This is what the PNG will look like. The checker was filled with my background.

If you want to know more about the program, I can advise you on the course « Photoshop from scratch in video format » ... It is perfect for beginners. There is a lot of useful information here about the tools and when each is appropriate.

The Internet is full of lessons that you can learn from, but it is one thing to blindly repeat after the author and it is quite another to meaningfully achieve the goal, knowing what you will have to use for this. This is a completely different level.
Site help
Do you like the site? Have the lessons been helpful? You can support the project simply by downloading and installing the "Flashlight" application for Android. The application was written by the author of the site and expects to publish his applications in the future. The flashlight controls the LED on your phone's camera flash and also turns on the backlight at full brightness.
Advantages: flexible settings. You can set in the settings so that the flashlight turns on immediately when you start the application and automatic switching on timer when starting the application. The settings allow you to turn off the screen lock and lock the flashlight with the phone's power button. You can also set the timer time yourself.
If the application gains popularity, it will give an incentive to the author to create new applications, taking into account the wishes of site visitors.
Thanks in advance, Dmitry.
QR code for installation:
If you liked the material, say your "thank you", share the links with your friends on social networks! Thanks!