Functional test of apple equipment. Prevention of the Macintosh computer and its operating system. How to run hardware diagnostics
One of the most simple ways Find out if your Mac is having hardware problems by running Apple Hardware Functional Test or Apple Diagnostics. Yes, most Apple users do not experience any malfunctions, but sometimes problems arise: drive damage, memory failure, unstable graphics or motherboard... There are many different defects hardware.
The good news is that Apple Hardware Functional Test allows you to easily determine if there is a hardware failure. Keep in mind that Apple Hardware Functional Test can only be run on devices manufactured prior to June 2013. Newer models will load Apple Diagnostics.
The programs are somewhat different, but they have the same functionality. Hardware testing is the same on all Apple computers, be it iMac, MacBook, MacBook Pro, MacBook Air, Mac mini or Mac Pro, version operating system also doesn't matter.
How to diagnose Mac hardware:
Step 1: Connect your Mac to a power source.
Step 2: Disconnect all external devices except display, keyboard and mouse.
Step 3: Shut down your Mac and press the power button again to turn on your computer.
Step 4: Press and hold the "D" key on the keyboard until the gray boot screen * appears.
Continue holding "D" until you see a progress bar instead of the normal loading screen.
- If your Mac boots up in Apple Hardware Functional Test mode, an icon appears on the screen.
- If your Mac is downloading Apple Diagnostics, you will see a progress bar or language selection screen.
Step 5: For “Functional Hardware Test”, check the box next to “Perform Extended Test” and click “Test”. For Apple Diagnostics, wait for the Mac check to complete.
The diagnostic tool will notify you of any faults found.
- If any error is found, then your Mac has a hardware problem.
- If no errors are found, the computer hardware is working and there is likely a problem in software... In this case, you should do backup data and reinstall Mac OS X.
* If you have problems downloading Apple Diagnostics, press Option + D to download the test over the Internet.
If a malfunction is found during the test, the error code and other details shown on the monitor should be noted. This will help you when contacting technical support. For Mac computers with Apple Diagnostics, help codes are available at support.apple.com.
The example below shows that the Apple Hardware Functional Test found a problem with SATA interface and issued an error code: "4HDD / 11/40000000: SATA (0,0)". This means a malfunction hard disk.
If you are having problems with your Mac and are still under warranty, you should contact an Apple Authorized Representative. Some errors can be corrected by yourself by replacing random access memory or hard drive, but if the case is under warranty, you should not worry, since the certified service center Apple must comply free repair computer.
If the warranty has expired, you can try to fix the problem yourself, but this method is only suitable for tech-savvy users.
It is very easy to distinguish between hardware and software faults. The damaged hardware problem cannot be fixed by reinstalling the operating system, while the software problem will most likely go away. It is also worth keeping in mind that some software itself does not work correctly and such problems appear only when using a specific application.
Any device, regardless of its complexity, from time to time requires a preventive examination in order to quickly track the emerging problems, eliminate them in time at the inception stage and prevent reappearance. Despite the fact that Macs (both desktop and mobile) are famous for their reliability, they should also be prevented from time to time. Mac OS X contains many different settings and temporary elements, both at the software and hardware level, which can affect the operation of the system as a whole and individual applications. We will talk about this in today's article.
We want to warn you right away that not all of the tips below should be used in any case - some of them are recommended to be used only in case of obvious problems.
IRON PREVENTION
Prevention of iron by the user is to work with the PRAM and PMU settings, the data of the disk boot volume and the structure of the partition table. With the proper skill of the user and experience in assembling and disassembling your Mac, it is worth regularly cleaning its insides from dust.
- Checking the primary disk partition
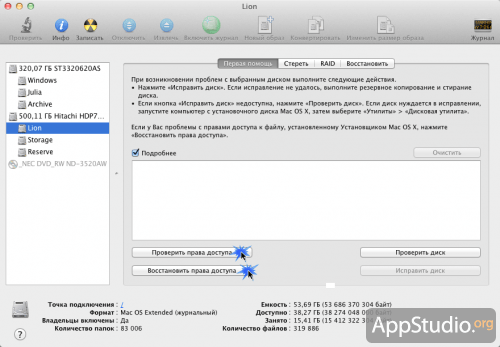
We reboot the computer, but we do not boot as usual, but from the recovery disk or from any other boot volume (installation DVD, backup copy main section, etc.). During the boot process (using the installation DVD) or after a full download, run Disk Utility and, having selected the main partition with the system in it, we perform a disk check in order to find out if everything is in order with the structure file system disk. The same check can be done by booting in normal mode, but in the case of booting from a different media, the efficiency of the check will be slightly higher.

- Apple Hardware Test
For any Mac, there is also an official tool for testing hardware for errors. It's called the Apple Hardware Test and can be found in a wide variety of locations:
- on installation disk Mac OS X that came with the Mac (if you bought it with Leopard 10.5.4 or older)
- on the software disc that came with the Mac (if the Mac was preinstalled with Mac OS X 10.5.5-10.6.8)
- on the Recovery partition or even on the Internet (if the Mac was sold with OS X Lion)
Depending on the Mac models, the way the test is run may vary. As a rule, to enter the test, you need to hold down the D key when you turn it on (not when you reboot!). If Apple Hardware Test is on the Recovery partition of the disk, then use the Command + D combination.
If the D key does not change anything, try inserting the discs that your Mac came with into the drive and clamping it down the moment the computer turns on from the DVD in the drive.
If Apple Hardware Test finds any errors, it will be very important to remember (or better, write down) their codes. This will come in handy when communicating with technical support.
If there is no other media to boot from and once again bother with Disk Utility you don't want to either, then you can load the Mac in safe mode... This mode is good in that, among other things, with such a start, several system maintenance procedures will be launched and a disk check for errors will be forced. In order to boot the original Mac in safe mode, the user just needs to hold down the key while booting. SHIFT , in the case of using Hackintosh - boot with the flag -x .
- Resetting PRAM
PRAM is a parametric random access memory that stores some settings of the operating system and devices in order to provide for Mac OS X fast access to them. The number and name of the settings varies depending on the type of computer and the devices and disks connected to it. But almost always there are stored video and monitor settings (refresh rate and screen resolution, number of colors and some others), information about the starting volume of the disk, set speaker volume, data about the latest kernel panic.
In some cases, clearing PRAM will help to cope with certain problems that have arisen. To clear PRAM, it is enough to hold down the keys when starting the computer COMMAND + OPTION + P + R (you need to have time to press them before the gray screen appears) and do not release until the Mac boots up and you hear the Mac OS X welcome sound.
If you have a RAID array on your Mac, it may happen that after you reset the PRAM, the computer will refuse to boot correctly. In this case, you should try to boot with the key pressed. OPTION to the screen for selecting the system to start, and if this does not help, then restart the Mac by holding down the keys COMMAND + OPTION + SHIFT + DELETE .
- Reset SMC
The SMC module is a computer chip that is usually found on the motherboard and is responsible for managing all aspects of the computer's power supply. It controls the rotational speed of the hard drive, hibernation on and off, charging, and the effect of connected devices to hibernate. In the event that there are problems with sleep mode, inability to turn on the computer while running on battery power, or other power problems, then resetting the SMC settings can help solve them. For different Macs, the SMC reset process is slightly different, so to get instructions on how to reset specifically for your Mac, we refer you to the Apple knowledge base, where everything is described in detail. As an example, here is the SMC reset procedure for MacBook Air and Mac Mini.

- Shut down your MacBook and disconnect all cables from it.
- Connect the AC adapter cable to it.
- Press and hold the keys CONTROL + SHIFT + OPTION on the left side of the keyboard (exactly on the left), and then press and hold the power button too.
- After 5 seconds, release all buttons and press the power button again.

- Disconnect all cables from the computer, including the power cord.
- Wait 10 seconds.
- Plug in the power cord while holding down the power button on the back of the computer.
- Release the power button.
- Turn on the computer by pressing the power button again.
- Cleaning Mac from dust
This procedure requires some experience and practice in disassembling and reassembling the Mac. Despite the seeming complexity, the operation can significantly help in the fight against insufficient cooling of the case and computer components, because the Mac, like any other electronic equipment, is an excellent dust collector. Of course, not every Mac can be easily disassembled. You can find out how this is done and how difficult it is on the iFixit portal.

However, if you are not confident enough in your abilities, then it is better to clean your Mac from dust at a service center.
PREVENTION OF THE SYSTEM
Prevention of the system is reduced to checking the status of the rights to files and folders, cleaning various caches and cleaning other garbage.
- Verification and restoration of rights
The procedure for checking and, if necessary, restoring access rights to files and folders may turn out to be quite useful. To do this, boot in normal mode from the main boot partition and start again Disk Utility, in which we perform the above operations.
- Emergency start of the Mac OS X self-cleaning system
Mac OS X is enough smart system and it has a built-in self-cleaning system that independently cleans up various temporary files and other garbage. Everything would be fine, but there is one problem - the self-cleaning system starts at strictly defined hours, when computers Russian users as luck would have it turned off. How to solve this problem and independently start the self-cleaning process in detail in one of our articles devoted to working with the Terminal.
- Cleaning extensions and system cache in Mac OS X
At possible problems cleaning system extensions can help with drivers, and clearing the system cache will help the system "breathe" more freely. Per detailed description the cleaning process also take you to the above-mentioned article on working with the Terminal.
The final finishing touch to prevent the operating system is to restart the computer. Do not be surprised if the Mac takes too long to boot up after cleaning for the first time - this is normal. Reboot the machine again and boot will proceed normally.
Alternatively, for the prevention of the system, you can use various specialized applications that greatly facilitate this process and save you from operations with Terminal, Disk Utility and other frightening applications for beginners. We have already talked more than once on the pages of our site about similar programs, for example, about or.
Keep your Mac in order, take care of it regularly and it will repay you with years of impeccable work;)
Before going to the service center with your Mac any the user can independently check their computer for problems. Perhaps, knowing what the problem is, the user will be able to carry out simple repairs on his own.
Since from Apple's instructions this case little sense - they send exclusively to the service center, then I have compiled my own guide to solving problems with Mac.
- If the computer was released after June 2013, then the checker is called "Apple Diagnostics"
- If the computer was manufactured before June 2013, the test program is called "Apple Hardware Functional Test"
Regardless of the name, the utilities work almost identically.
How do I run Apple Diagnostics?
Step 1. Disconnect all devices except mouse, keyboard, network cable and monitor.
Step 2. Turn off your computer.
Step 3. Turn on the computer and press the D button. Hold it until a special screen appears with a choice of language.
Step 4. Choose Russian and the check will start automatically. It does not last very long - 2-3 minutes.
If you do not start the usual diagnostics, then at boot press Option + D and the diagnostics will start using the Internet. For example, I had to do so, because I changed a long time ago in MacBook hard drives and, of course, I no longer have a recovery partition. This picture can hang for 5 minutes. If it freezes, then restart your computer.
This is how the diagnostics look like on the MacBook Pro 2011. At the beginning, we find and select the line “Select Russian as the main language”:

After that we press "Test":

Apple error codes on MacBook
| Error code | Problem | What to do? |
|---|---|---|
| ADP000 | No problems found | If the problem still exists, then search the Internet for a solution. |
| CNW001 CNW003 CNW004 CNW005 CNW006 | There may be a problem with the Wi-Fi module. | |
| CNW007 CNW008 | No Wi-Fi networks found. There are no Wi-Fi networks available, or the Wi-Fi module is defective. | Try a Wi-Fi network at this location on another device. If it works, then you have a problem with the Wi-Fi module. |
| NDC001 NDC003 NDC004 NDC005 NDC006 | There may be a problem with the camera. | |
| NDD001 | There may be a problem with the USB module. | Disconnect everything USB devices and run the scan again. Then connect the working device one by one to Wi-Fi modules and run the check. |
| NDK001 NDK003 NDK004 | There might be a problem with the keyboard. | |
| NDL001 | There may be a problem with the Bluetooth module. | Try to connect several different devices in the system and check if there really is any problem with Bluetooth. |
| NDR001 NDR003 NDR004 | There might be a problem with the trackpad. | |
| NDT001 NDT002 NDT003 NDT004 NDT005 NDT006 | There might be a problem with the Thunderbolt module. | Disconnect Thunderbolt devices. Run the scan again. |
| NNN001 | Serial number not found. | |
| PFM001 PFM002 PFM003 PFM004 PFM005 PFM006 PFM007 | There may be a problem with the System Management Controller (SMC). | |
| PFR001 | There may be a problem with the computer's firmware. | |
| PPF001 PPF003 PPF004 | There may be a problem with the fan. | You can theoretically disassemble the laptop, remove the fan and clean it. I do this every six months. |
| PPM001 | There may be a problem with the memory module. | The laptop can be disassembled. Get out the memory modules, if possible, swap the brackets. |
| PPM002 PPM003 PPM004 PPM005 PPM006 PPM007 PPM008 PPM009 PPM010 PPM011 PPM012 PPM013 PPM014 PPM015 | There may be a problem with the built-in memory. | |
| PPP001 PPP002 PPP003 | There might be a problem with the power adapter. | Unplug the AC adapter from the wall outlet and from the computer. Reconnect and test. |
| PPP007 | The power adapter has not been tested. | Reconnect the power adapter to a guaranteed working outlet. Run the scan again. |
| PPR001 | There might be a problem with the processor. | Sadness if the error is repeated ... Here it is definitely better to refer to the service. |
| PPT001 | No battery detected. | |
| PPT002 PPT003 | The battery will need to be replaced soon. It is serviceable, but its capacity has decreased. | For some Mac models, the battery can be completely replaced by yourself. |
| PPT004 | It is required to re-run the diagnostics via the Internet (described at the beginning of the article). Apple uses the most modern facilities battery diagnostics. If the problem is confirmed and the battery does not work for you, then think about replacing it. | |
| PPT005 | The battery is installed incorrectly. Shut down and shut down your computer. Your computer needs service. | Disconnect and reconnect the battery. |
| PPT006 | The battery needs service. The battery is defective, although this may not affect performance or capacity. Until the test is completed, you can continue to use the battery without damaging your computer. | I would still replace the battery if the capacity drops to zero, because without it, Mac OS will automatically slow down the computer's performance. Reaches up to noticeable brakes. |
| PPT007 | The battery needs to be replaced. The battery is in good working order, but its capacity has decreased significantly. Until you replace the battery, you can continue to use it without damaging your computer. | The above advice is given! |
| VDC001 VDC003 VDC004 VDC005 VDC006 VDC007 | There may be a problem with the SD card reader. | |
| VDH002 VDH004 | There might be a problem with the storage device. | Check hard drives for errors with special utilities. |
| VDH005 | Unable to start OS X recovery. | OS X can even be installed from a USB stick. Look for instructions - it's easy. |
| VFD001 VFD002 VFD003 VFD004 VFD005 VFD007 | There might be a problem with the display. | |
| VFD006 | There might be a problem with the GPU. | |
| VFF001 | There might be a problem with the audio hardware component. |
What else do you need to know?
The test does not always display errors. Here I have some problems with the SD slot, but the test did not reveal any errors. Extended testing may be required.
Many problems, especially with older models, can be solved on their own, but if you are not confident in your abilities, then take them to an Apple service center. How older model, the easier it is to disassemble it, which means it is easier to repair the required module.
Not all Mac owners are aware of the hardware test built into the system.
The diagnostic tool helps you identify problems with your drive, RAM, video card, or motherboard without a visit to the service center.
What Macs have this utility

On Mac computers manufactured before mid-2013, the diagnostic tool was called Apple Hardware Test.
Since mid 2013 Apple Hardware Test replaced with Apple Diagnostics, the utility requires a Wi-Fi or Ethernet connection to work.
When you need it

If your Mac begins to glitch for no reason, freezes, thinks for a long time without much work, gets very hot or does not turn on corny, you should conduct this test.
Checking the equipment will be useful in case of any suspicion of mechanical damage, for example, after a computer has been dropped or after a device gets wet.
How to run hardware diagnostics

Make sure your computer is within range of a familiar Wi-Fi networks or connected by cable. If using a laptop, connect it to the charger.
To run Apple Hardware Test or Apple Diagnostics, you need to:
1. Turn on / restart the Mac, while turning it on, hold down the button D on keyboard.
2. Select the required utility language.
3. Wait until the utility finishes (usually the process takes several minutes).
You will see the error code (if any) and a short description in the report.
How to understand what the problem is

Error code "ADP000" indicates no problem. You can restart your computer and work normally. Other codes indicate hardware problems.
The decoding of all codes and subsequent actions are detailed on the Apple website.
Why all this is needed

Attentive readers will notice that in most cases it is still recommended to visit the service center to solve the problem, and no one wants to poke around in an expensive Mac on their own.
Why then bother with diagnostics and determine the cause of the malfunction?
At first, problems can arise after an upgrade at home. For example, I installed a RAM bar, but it broke. There is no need to go to the service: I pulled out the memory, changed it to another.
Secondly, if any old port or connector is broken, you can simply not use it. For example, a failed Thunderbolt may require replacing the motherboard, which is a rather expensive repair. An older Mac user would rather find alternative way connections.
Thirdly, when you go to the service center, you will be armed with information this test... So that repairmen do not try to rip off money for expensive repairs, it is better to know the cause of the breakdown.
⭐ Thanks to re: Store for the helpful information.
Rate it.
Taking into account the fact that more and more smart guys offer to buy a brand new MacBook at a very good price from their hands, I decided to write this text. In it I will tell you how to understand exactly what you are buying for your hard-earned money.
Quite often in recent times they called me and asked what they had with the new MacBook. In some cases, a rather interesting, but no less sad precedent for the owner took place. Most often there was such a situation - the victim was looking for a cheaper place to buy a brand new MacBook. Of course, last but not least, the search went on flea markets such as Avito. There was a seller there offering a top-end laptop at a price much lower than our official retail price. At the initial examination, everything was as it should. The laptop is packed, in a film, when you open it, the cloth lay on the keyboard as it should. Opening the Oh This Mac window also showed the maximum configuration. The happy customer gave his money and went home, relieved. But it was not there…
In fact, the configuration turned out to be far from the one bought by the hapless friend. In all cases, these were the cheapest Macs. The guys just cheated the system and wrote what is installed in the maximum configuration. I will not explain how this is done, I will only say that this is a question for 10-15 minutes. And your dead MacBook turns into a super-modern monster ... But fortunately there is a way to make sure and see exactly what you are giving your money for. He is the only one whose result cannot be influenced in any way. 
I think some have heard about such a thing as Apple Hardware Test. Apple service technicians need it to diagnose the problem. But he can serve us very well, too. All that is required for this is to press the D button when loading (in some cases Cmd + D). Then we find ourselves in such a window. Russian language is also available. Click on next. 

This is where all the information about the hardware of the laptop is available to us.
Moving through the tabs, we can see the section of interest to us: (interestingly, in my MacBook Pro Retina shows the screen resolution that is currently specified in the settings, and not the actual 2800x1800 pixels.) 

You can also click the "Test" button and check the filling of the computer in order. During the test, the coolers are accelerated to their maximum speed for a while, there is nothing to be afraid of. 


After the end of the test, you will be given an answer whether it is worth transferring money to the seller. 
That's all, I hope this small guide will save you from spending your hard-earned money on something that is not clear.