How to clean windows xp from garbage. How to clean up a disk from debris. Cleaning the disk in Windows from garbage. We remove all unnecessary at once
Many people notice that the Windows folder is growing, and the download speed is dropping. We clean the Windows folder! We will help you clean Windows XP from "garbage".
The first thing to clean up "% windir% / temp /" is to delete everything from there. We also delete everything from the folders "% systemdrive% / Documents and Settings /% user% / Local Settings / Temp /" and from "% systemdrive% / Documents and Settings /% user% / Local Settings / Temporary Internet Files /". Perhaps after these actions the Windows folder will "lighten" by 1-2 gigabytes, and the "Documents and Settings" folder may even lighten up to 20 GB.
Now let's tackle the stocks that Windows Update makes. V Windows folder there will be folders like "* $" and "* $". These folders contain the files that are required for correct deletion installed updates... If deletion is not required (which is usually the case), then they can simply be deleted. After uninstalling, go to "Add or Remove Programs", put the checkbox to show updates, and delete everything Windows updates(for cleanliness).
ATTENTION! You cannot delete the "$" folder! It is used to install new updates.
Go to the "% windir% \ Installer $ PatchCache $ \ Managed \" folder and clean up all its contents. This folder contains the base versions of files that are changed when the software is updated using msp patches and they are used in order not to ask for the distribution kit with each update. If the installer does not find these files, it will ask you to insert a disc or indicate the path from where the program was installed.
Now let's set up the "% windir% \ SoftwareDistribution \" folder. All downloaded updates from Windows Update are saved in this folder. After using the system for a long time, this folder becomes quite large. We clear the Downloads folder in it. The Windows folder is cleared by another 500-2000 MB.
After installing Service Packs, the "% windir% \ ServicePackFiles" folder appears, in which the updated versions of the files are stored. This folder can be deleted, but, of course, it is advisable to have a distribution kit, in case something gets into the system and replaces critical Windows files... In this case, in fact, there is a folder with a volume of 500 MB. If desired, this folder can be moved to another drive so that the service does not "lose" them, it is necessary to change several parameters in the registry. We start the registry editor and go towards "HKEY_LOCAL_MACHINE \ SOFTWARE \ Microsoft \ Windows \ CurrentVersion \ Setup", along this path we edit the parameters "ServicePackCachePath" and "ServicePackSourcePath".
Next, to optimize the system, we clean the Prefetch folder, which is located in the Windows folder. The prefetch folder (.pf extension) contains information about frequently opened programs and services for faster subsequent loading. From it you can, and moreover, you need to periodically delete everything, the system will boot faster, and programs (for the first time) slower. Then the files are formed again, so we take the folder "on a pencil" and periodically clean it.
And again from optimization: it is important sometimes to clean the C: \ WINDOWS \ system32 \ spool \ PRINTERS folder! This daddy creates a lot of "pleasant" moments for the owners of printers (especially HP). In general, it stores print queue data. It often happens that in the event of a failure, we in the "print manager" clean up the "hung" documents and calm down on this. However, if the folder is not empty, and the system sees this, it calls spoolsv.exe and it starts to consume 99% of the memory. After being "killed" through the task manager, this process after a while is started again by the system and continues to poison life. Similar symptoms are also characteristic of some viruses that disguise their activities as spoolsv.exe, but more often than not, it is enough to simply empty the specified folder!
We go to the Windows / System32 / dllcache / folder Only files need to be deleted using the Start - Run - sfc / cachesize = 0 next sfc / purgecache. Well by hand after the commands, too, of course.
Finally, you can clean the System Volume Information folder, but keep in mind that these are your restore points.
If you do it all "lazily" by hand, then cleaning programs like CCleaner will come to the rescue, but keep in mind that abuse of cleaners can lead to an unscheduled reinstallation of Windows.
If, nevertheless, any system file was deleted, but the OS boots, sometimes the sfc / scannow command and the Windows distribution kit inserted into the DVD-Rom can save the matter.
It's no secret that applications in Windows XP use computer memory for their work - the space on RAM. In order to increase the performance of a computer when launching several applications (or one capacious one), users create virtual memory that the computer uses when there is not enough space on RAM. But such a solution also needs to be periodically cleaned, otherwise there will be zero sense from it. How to clear virtual memory in windows XP, we will try to explain in this article.
Manual cleaning
It is worth saying that before sinning on an overflowing virtual memory, you should understand the real reasons for the PC freezing. To do this, defragment your disks, remove unnecessary programs and only then do the cleaning. To do this, you must carefully follow all the established recommendations:

Setting automatic mode
This paragraph is recommended to be read by those who have at least once encountered the registry, and have a rough idea of what it is. In addition, you need to be pretty brave and not be afraid to spoil something, but if you follow the established scheme, then nothing bad will happen.
For start automatic mode to clear virtual memory in Windows XP you will need:

Before carrying out all the manipulations, it is recommended to do backup registry. To do this, in the window of the registry editor, select the item "FILE", then "EXPORT", select the save location, put a tick in front of "ALL REGISTER" (in the lower left corner) and create a copy.

Now on every reboot Windows computer will clear the virtual memory itself. If something went wrong, and after restarting your computer behaves inadequately, then download a copy of the previously made registry by double-clicking on the file.
Accumulation of residues remote applications, unnecessary registry entries, temporary files, logs that remain after updating Windows and programs, and other debris slows down the computer's performance. If all this is not removed, over time, the PC becomes so slow and annoying that the user can not stand it and reinstall the system. However, after a couple of months everything is back to normal - brakes, low FPS, and all sorts of glitches. Meanwhile, the problem is solved simply - it is enough to do preventive maintenance 1-2 times a month using a computer cleaning program. Today we will talk about them.
We have prepared a brief overview of the capabilities of the best Windows utilities that can give your system acceleration up to 50-70% relative to the original level. All of them are free and designed for newbie users.

CCleaner is one of the most popular Windows cleaning utilities in the ranking of users. And one of the safest. Cleaning the registry and applications in CCleaner is configured in such a way that, if you want to, you will not be able to delete something important, thereby disrupting the system's performance. In this part, the program can be used fearlessly by novice users. However, it also has such functions that it is better not to touch without proper knowledge. One of them is erasing disks. If you accidentally confuse it with Disk Cleanup (built-in tool Windows optimization), you can permanently lose any important data, as the program destroys them irrevocably.
Competent use of CCleaner allows you to speed up your computer by 5-50%. The result depends on the initial trash of the system and the amount of information on the disks.
CCleaner functionality

All functions of the application are divided into 4 groups, and the groups are divided into subgroups. The first group - "Cleaning", includes sections:
- Windows (Edge and Internet Explorer, conductor, system components etc).
- Applications ( third party browsers, multimedia, internet applications, system applications etc.).
Clearing both of them removes only temporary and unnecessary data, without affecting the main one.
The second group - "Register", has no subgroups. Here is a tool for fixing registry errors and cleaning it from junk.
The third group - "Service, contains the following sections:
- Management of startup programs.
- Browser add-on management.
- Analysis of the distribution of disk space.
- Search for duplicate files.
- System Restore.
- Erasing discs.
The fourth group is "Settings". It includes:
- The main parameters of CCleaner.
- Browser Cooke files (setting exceptions).
- Inclusions (objects that should always be deleted).
- Exception (objects that the program shouldn't handle).
- Application tracking (autovacuum setting).
- Trusted users.
- Additional parameters (for experienced).
CCleaner supports many languages, including Russian, Ukrainian, Kazakh. You can download it in both installation and portable versions. The latter can be launched, for example, from a USB flash drive.
Wise Care 365

Wise Care 365 - is an impressive package of utilities for computer optimization, most of which are available for free (the application is released in two versions - free and premium, in free version some items are locked). As in CCleaner, Wise Care 365 scans the system for garbage, errors, incorrect (from the point of view of developers) settings and makes it possible to fix it - both individually and in bulk.
With this program, the user can clean and optimize Windows without thinking about the purpose of a particular function. It is enough to start scanning and press the "Fix" button after it.
Wise Care 365 functionality

Wise Care 365 features are also divided into groups. The first tab - "Check", is intended for a comprehensive search and elimination of problems in the entire system. The following parameters are checked:
- Security.
- Not required files(temporary, cache, logs, etc.).
- Invalid registry entries.
- System optimization (the presence of factors affecting performance).
- Computer history (opening documents and visiting web resources through Internet Explorer).
After scanning, the program determines the index of the "health" of the PC and offers to correct errors by pressing one button.
On the same - the first tab there is a panel additional utilities... The free version includes:
- Deleting Files That Cannot Be Deleted Windows tools.
- PC shutdown timer.
- Recovery deleted files.
- Memory optimization.
- Uninstalling programs.
The second tab - "Cleaning", contains several subsections:
- Cleaning the registry.
- Fast cleaning disk.
- Deep cleaning.
- System cleaning (unnecessary Windows components).
The third tab - "Optimization", contains:
- Subsection "Optimization" (here you can change the registry settings to stabilize and speed up Windows work, improve network performance, shorten the time to turn on and off the computer).
- Defragment disks.
- Compression and defragmentation of the registry.
- Startup management.
The "Privacy" tab contains the following subsections:
- Disk wiping.
- Wipe files.
- Password generator.
On last tab- "System", the application shows running processes and a list of PC equipment.
Wise Care 365, like Ccleaner, is translated into Russian and is released in installation and portable versions.
Windows Cleaner

The Windows Cleaner utility includes tools to free the system from unnecessary files, registry entries and unused programs that can be launched manually and on a schedule. From optimization tools, there is only startup control. There are no options for improving the performance of your computer (apart from cleaning tools).
Windows Cleaner keeps a history of previous cleanings. If you accidentally delete an important registry entry or file, the program allows you to undo the last operations - perform a system restore to a checkpoint.
Functionality of Windows Cleaner

In the "Cleaning" section of Windows Cleaner there are two tabs: "Files" and "Registry". The first is a list of unnecessary objects file system, on the second - registry entries. The program supports 4 cleaning modes for both:
- Quick.
- Optimal.
- Deep.
- Custom.
After scanning, Windows Cleaner displays a list of objects to be removed. Strange, but the user has no way to remove any file or record from it. Only the entire group of objects (temporary files, memory dumps, report logs, etc.) can be excluded from scanning.
The "Service" section contains the "Startup" and "Uninstall Programs" tabs.
The "History" stores records of previous transactions.
In the "Tinctures" you can set the scheduled cleaning parameters: interval, time, mode.
Windows Cleaner was developed in Russia. The official website has reference Information for working with the program in Russian, as well as the form feedback with the developer.
Glary Utilities Free

Glary Utilities Free is a free harvester application for computer optimization. Its set includes more than thirty utilities for all occasions, and some of them are unique for products of this class or are found only in paid versions... For example, finding and removing spyware (spyware software), checking for updates of programs installed on the computer, encrypting files, optimizing memory, cutting and merging files, etc. The list of frequently used utilities is shown in the screenshot above.
Glary Utilities Free features

Functions Glary utilities Free are divided into 3 groups:
- Short review.
- "1-click".
- Modules.
Section "At a Glance" contains General settings programs and controls Windows autostart.
The "1-click" contains tools for fast system optimization:
- Cleaning the registry.
- Fixing shortcuts.
- Removal of spyware.
- Recovery (check) of the disk.
- Privacy.
- Removing temporary files.
- Startup manager.
In the list of problems, there is an explanation next to each item. In addition, the user has the ability to prohibit the correction of any item by unchecking the box next to it.
The "Modules" section contains all the components (utilities) of the program that the user can run separately - as needed. This includes tools for cleaning, managing disk space, files, etc. The bottom bar of all tabs in the main window contains shortcut buttons for some of them.
Glary Utilities Free has another cool feature - creating a portable version of itself. The option is in the "Menu".

WinUtilities Free
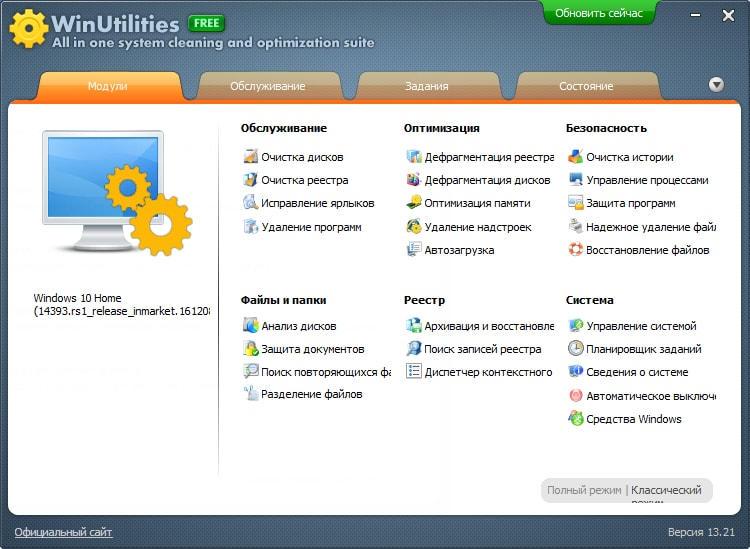
Functional free version WinUtilities Free, like Glary Utilities, is quite versatile for this class of applications. It includes 26 modules for system maintenance and cleaning. There is also a one-click Windows optimization function, and its own task scheduler for performing scheduled operations.
WinUtilities Free Features

The "Modules" tab of WinUtilities Free contains a list of all application components, divided into groups:
- Maintenance (cleaning disks, registry, shortcuts, etc.).
- Optimization (defragmentation of disks, registry, startup management, etc.).
- Security (cleaning history, managing running processes, deleting and restoring files).
- Files and folders (document protection, analysis disk space, find duplicates).
- Registry ( backup, search for partitions and keys, dispatcher context menu).
- System (start Windows utilities, system management, task scheduler, customization automatic shutdown computer).
The "Maintenance" tab contains settings for quick scanning and system optimization with one click.
The "Tasks" section includes 4 options for scheduled PC maintenance:
- Cleaning disks.
- Clearing history.
- Cleaning the registry.
- Disk Defragmenter.
The Status section displays information about the product.
InfoMan

InfoMan is an easy-to-use information management manager for PC. Consists of five modules that run separately. The cleaning module is used to find and delete temporary files in the program or user list.
Other InfoMan modules are intended for:
- Synchronization of data in two specified directories.
- Storing passwords.
- Event reminders.
- Application settings.
After launching the program icon is placed in the system tray. Modules are launched from its context menu.

Advanced system care

Advanced System Care is the latest program for comprehensive computer maintenance from the well-known developer IObit in our review. In addition to cleaning and optimization tools, it contains tools to improve performance and protect various system components.
Advanced System Care Features

As with the rest of the reviewed applications, Advanced System Care features are divided into categories:
- Acceleration.
- Protection.
- Cleaning and optimization.
- Instruments.
- Center of action.
The Acceleration tab contains tools to improve computer performance: turbo acceleration, hardware acceleration, etc.
"Protection" contains tools to improve security - video identifier of the user's face, anti-tracking tools in the browser, safe web surfing, and more.
The "Cleaning and Optimization" contains utilities for removing garbage from the file system and registry.
Tools lists all application modules plus other IObit products.
Action Center contains tools automatic update programs installed on the PC and downloads of other IObit products.
In addition, Advanced System Care installs a widget into the system that is constantly on the screen and displays the percentage of loading random access memory and processor.
The applications included in today's review support all editions of Windows, from XP to Windows 10. We decided not to talk about programs whose authors limited themselves to supporting systems prior to Windows 7, since they are out of date today.
From clogging up your local disk, all processes on the computer may become slower, and there will be no more space for anything new. You can clean Disk C manually by going through folders one by one, but it's better to use special programs who will help you with this. Don't forget about the cache, registry cleaning and timely deletion of the contents of the recycle bin. In this article, you will learn how to clean the contents of a local disk as quickly and conveniently as possible, as well as how to format it completely. You may need to format your hard drive for various reasons, and this process will not take much time. Take on board all the tips in this article.
How to clean local drive C
Even if you don't have a lot of information stored on your hard drive C, it can get clogged and inevitably cause problems when working at the computer. To complete the complete cleaning process, you need to follow these steps:
- Manually clear folders from unnecessary media.
- Erase downloads.
- Remove old unnecessary programs.
- Clear the computer's cache.
- Clean up the registry.
After that, you can free yourself from several gigabytes to hundreds, depending on how many unnecessary files you have accumulated.
Empty your media folders
You may have downloaded movies to watch, music, and lots of pictures. It's time to delete all these files, especially if you no longer use them.
Delete any files that may be in the Pictures, Videos, or Music folder. Also you can have your own folders for this purpose.
Erase downloads
The Downloads or Downloads folder always contains a huge amount of old files. You may not even remember about the existence of such a folder if you changed the download settings, and now all downloads are saved on your desktop. Go to "Downloads" in the "Users" folder and clear it of old files, sort the ones you need, and just delete the rest.

Empty your basket regularly
The trash should be emptied regularly, and if you are deleting large files, right away. After cleaning downloads, multimedia and other large files, immediately right-click on the trash can icon and click on "Empty Trash".

The size of the files in the recycle bin may surprise you a lot. As you can see, in the screenshot below, 25 Gigabytes of files fit into the basket.

Download CCleaner and clear your cache
Whatever the volume of your hard disk, as a rule, sooner or later, the place on it ends. If the disk is a system disk, then the lack of space can lead to partial or complete inoperability of the computer, because during operation, the operating system and most programs actively use it to create temporary files.
To avoid such problems, you need to monitor the availability of free disk space and periodically delete temporary files.
To delete temporary files in Windows XP there is special tool - Disk cleanup... To start it, right-click on drive C and from the drop-down menu select the item Properties
In the tab General push the button Disk cleanup and wait a few minutes while the system compiles a list of files to be deleted

Then we are given a list of what the system thinks is superfluous and can be deleted

If you wish, you can see in more detail what exactly we are proposed to delete. I usually just mark all the items, the system will not delete the excess. Separately, it is worth mentioning the item Compressing old files... Here files that have not been used for a while are not deleted, but placed in the archive. This way you can free up a lot of disk space, but I mark this item only as a last resort, because the archiving procedure is very time-consuming.
We can go to the tab Additionally and remove unused programs and Windows components as well as system restore checkpoints, although I prefer to do this separately from the control panel

Then click OK and watch the process

If the space freed up as a result of cleaning is enough, you can finish there, but if not, then move on.
Right-click on the icon My computer and select the property item, then go to the tab System Restore

Here we can reduce the space occupied by restore checkpoints or disable System Restore altogether.
Then we turn off the possibility of hibernation, since disk space is reserved for it. To do this, go to Start-Control Panel-Power Supply and in the tab Sleep mode remove the checkbox allowing its use

And finally, we manually delete everything that is still not deleted. To do this, we need to enable the display of hidden and system files in the folder properties. Go to My Computer - Tools - Folder Options and select the tab View

Then follow the path C: \ Documents and settings \ Username \ Local Settings

In folder Temp the user's temporary files are located, and the Temp orary Internet Files folder stores temporary Internet Explorer files, so we delete all content from them, it is better to leave the folders themselves. If several users work on the computer, then the procedure is repeated for each of them. Sometimes it happens that the system displays a message that the file is in use and cannot be deleted. In this case, you need to reboot, after which everything will be fine.
Then go to the folder C: \ windows \ temp, the operating system stores its temporary files here. We delete everything from it too. Also, in the Windows folder, you can see many folders of the following form

These folders are created during the installation of updates as insurance so that in case of problems, you can roll back the changes. If the updates have already been installed and no problems have arisen with them, then these folders can also be deleted, especially since they take up quite a lot of space. Well, there you can also delete the installation log files and free up some more space.

Now we have removed everything that is possible (and even a little more) and our system disk clean. Well, as a final touch in the properties of the disk, select the tab Service and run defragmentation. This procedure will not add free disk space, but it can significantly speed up its work.
While working at the computer, a lot of unnecessary information accumulates on the hard disk. These are all kinds of temporary files downloaded from the Internet web page, as well as unused application files. The more programs you install and run, the more often you go online, the more chances there are of various useless garbage on your hard drive that takes up precious free place... To maintain order on your PC, you need to periodically clean up. The Windows XP operating system provides the user with many useful utilities, among which there is a program called "Disk Cleanup".
First this utility appeared in Windows Millennium and became very popular among users due to its convenience and simplicity. Subsequently, the program was included in the utilities of newer versions of Windows operating systems. Thus, the Disk Cleanup Wizard migrated to Windows XP. Let's move on to an example of the Disk Cleanup Wizard in order to appreciate all the advantages of this utility, and at the same time learn how to use it effectively.
The Disk Cleanup utility is located in standard set Windows XP utilities. To start it, activate Start, Programs, Accessories, System Tools, Disk Cleanup. Otherwise, the program can be run from the command line by typing its name: cleanmgr. After launching the utility, the screen will display working window programs.
To continue working, you must select a logical disk that will be subjected to the cleaning procedure. By default, the selected drive is always (C :). You can also start the cleaning wizard by going to "My Computer", selecting the appropriate drive, and by clicking on it right click, activate the "Disk Cleanup" tab. Then the cleaning procedure will be immediately launched specifically for the selected disk. Once you've identified the drive you want to clean up, you can click OK. In this case, the Disk Cleanup Wizard will proceed to the procedure for checking the status of files on this disk. It is necessary to show a little patience, as this procedure usually takes quite a long time.
After completing the analysis of the current state of the disk, the utility will present a report on the work done, indicating how much space can be freed. In addition, the wizard will display a summary of how disk space can be freed. Let's try to understand this report by analyzing the information provided by the Disk Cleanup Wizard line by line.
The wizard displays a list of file categories that can be deleted or compressed without affecting system operation. However, the user is asked to independently determine what should and should not be deleted. The tick marks the groups of files to be deleted. At the end of each line, the amount in kilobytes that can be freed up by deleting this category of files is displayed.
In order to confidently make his choice, the user needs to understand what the listed filegroups are. So, the Disk Cleanup Wizard offers to subject the following to the removal procedure:
- Downloaded Program Files
- temporary files from the Internet (Temporary Internet Files);
- files in the Recycled Bin
- temporary files of applications (Temporary Files);
- temporary offline files;
- offline files;
- stand-alone web pages (WebClient / Publisher);
- setup log files
- compressed files that have not been accessed for a long time;
- Content indexer catalog files used by the OS during the last indexing.
Let's take a closer look at each group. The Downloaded Program Files folder is for temporary storage of ActiveX controls and Java applications that are automatically downloaded from the Internet when you download and view various web pages. The folder can be cleaned up at any time.
The "Temporary Internet Files" directory contains web pages that are automatically saved to your hard drive while you browse the Internet so that you can access them again. At good connection the time for loading pages in a new way is not very long, and therefore it makes no sense to protect the contents of this folder. Since a large number of files accumulate in it, you should try to clean it up regularly enough.
Files are placed in the Recycle Bin after they have been deleted from the disk. This is the final frontier before the files are completely deleted and can be restored before the Trash is emptied. An absent-minded user who has inadvertently deleted necessary files can easily find them here. The name of the Recycle Bin speaks for itself - it is intended for garbage and should be monitored for overflow. Emptying the Recycle Bin will rid the drive of previously deleted files.
Some programs very often store temporary information in files, in a specially designated TEMP folder. As a rule, these files are usually deleted before closing such programs. However, this does not always happen, and therefore a lot of unnecessary information can accumulate in the folder. Temporary files that are stored for more than a week can be safely deleted.
Temporary Offline Files are local copies of recently used network files that are automatically cached. This makes it possible to access them in a disconnected state.
Offline files are essentially the same as temporary offline files, with the only difference that they are local copies of network files to which offline access was explicitly requested. Both those and others can be safely removed without negative consequences for the operation of the system.
The WebClient / WebPublisher service saves appropriately accessed files to disk. They are necessary to increase performance, and therefore can be painlessly removed.
One way to save space is to compress files that have not been accessed for a long time. At the same time, Windows retains the ability to access these files at any time, and no information is deleted. True, information about the freed up space in this case will be approximate as the files are compressed to varying degrees.
The indexing service is designed to speed up the search for files on disks. By creating indexes of files on disk, this service greatly expands the ability to locate the information you need. However, old indexes may be retained from the last indexing operation and should be dropped.
Thus, by reviewing the report of the Disk Cleanup Wizard, you can determine which of the detected files should be deleted. If necessary, by selecting any group of files from the proposed list, you can view its contents. To do this, just click the "View files" button. This is useful when only a few files from the entire group need to be saved. They can be rewritten to another directory, and the rest of the files can be mercilessly deleted. It is also worth noting that the composition of the components proposed for removal depends on the type of disc. For example, for non-bootable logical drives, the report typically only lists the contents of the Recycle Bin and the content indexer catalog files.
Using the More Options tab, you can free up extra space on disk by removing unused Windows components or installed programs. Each user should try to determine what kind of applications he uses when working at a computer. Anything else can be deleted.
After you have identified all the information to be deleted, you can safely click OK in the report window of the cleaning wizard. All selected files are removed, and Disk Cleanup exits automatically.
In conclusion, I would like to note that there are many different utilities that allow you to perform the disk cleanup procedure. Some developers offer comprehensive solutions to optimize Windows performance (Norton Utilites, Fix-It Utilites, System Mechanic, etc.). There are also programs specially designed for this purpose. Nevertheless, it makes no sense to dwell on their descriptions in detail, since the differences in the operation of such programs are not significant. Experience shows that standard utility Disk Cleanup is the most convenient and safest way to free up disk space. In addition, it is far from always possible to free up enough space by deleting only useless information. In this case, no utilities will be able to help, and you will have to figure out how you can get additional free space. Over time, each user gains enough experience in order to get rid of unnecessary and useless information on their own, so to speak "by hand", simply by deleting unnecessary files without fear of damaging the system. This is the most effective method of keeping your computer in order. And at the initial stage, the Disk Cleanup Wizard will always help you with this problem. Moreover, he is always at hand. Happy cleaning!
Additional tips for using the Disk Cleanup utility:
- The System Volume Information folder is used by System Restore. This is where the so-called restore checkpoints are stored. By default, the size of this folder is 12% of the disk space - that is, quite a lot. You can change the size of the reserved space, disable monitoring of one of the disks, or completely disable the restore function. The size of the reserved space can be changed in the control panel on the "System Restore" / "System" tab. Restore milestones can be removed by running Disk Cleanup. After selecting the disk, you must go to the "Advanced" tab, then "System Restore" and click the "Clean" button. The operation allows you to very significantly free up disk space.
- It is possible to pre-configure the configuration of the Disk Cleanup Wizard.
To do this, you must run the cleanup wizard from the command line using the Run procedure in the start menu. In this case, the line will look like this:
cleanmgr / sageset:
The / d switch specifies the disk to clean up. If this parameter is absent, all disks in the system will be cleaned up. The / sageset switch describes the set of parameters in the report dialog box of the cleanup wizard. Numerical value of this key describes different sets of parameters.
Unfortunately, after starting the wizard from the command line, an annoying window will still appear on the screen showing the cleaning process.
- If the Disk Cleanup Wizard did not please you for some reason, you can add another utility to the system instead. To do this, use the "Run" procedure to start the Windows registry editor by typing in command line regedit. Then you need to open the HKEY_LOCAL_MACHINE SOFTWAREM section, Microsoft Windows CurrentVersion ExplorerMyComputer. This section contains subsections for disk utilities. The CleanupPath subkey must be created for the Disk Cleanup Wizard. By default, the following value is used: "% SystemRoot% system32cleanmgr.exe / D% c" This line can be changed by specifying the path to another, own disk cleanup utility, with its own parameters. In addition, in this line you can enter the parameters for launching the Disk Cleanup Wizard itself, described in the paragraph above.
| Articles |