Is it possible to set up a wifi router without a computer. How to set up Wi-Fi on your phone? Step-by-step instruction. We connect the phone to the router
If you have a stationary computer or laptop at home, then there should be no problems with setting up the router. Installed, connected, configured, and you're done. But what if you don't have a computer, and you want to set up a Wi-Fi router yourself. A common situation in our time, now many people go online from tablets, phones and even TVs. The Ved router can work without any problems without connecting to a computer, I wrote about it.
So, if you do not have a laptop (PC), but you want to install a router yourself and set up a Wi-Fi network at home, then this can be done without any problems from the same tablet or smartphone (phone). The main thing is that the device can connect to a Wi-Fi network. Well, if you decide to get a Wi-Fi router, then you definitely have such a device. Your tablet or smartphone can run on both Android and iOS. That is, iPad, iPhone will do the same. If possible, then setting up is best, of course, from a tablet. Just because the screen is bigger there, and it will be more convenient.
The very process of setting up a router from a tablet is almost the same as setting up a router from a computer. Is that the connection itself, and a few more nuances, which I will now tell you about. The main thing that you should have is an Internet connection. (cable laid into the house) and the Wi-Fi router itself.
Setting up a router without a computer. From a tablet or smartphone
First of all, you need to connect the router, prepare it. Plug the router into a power outlet, and connect the Internet to the WAN connector (cable from ADSL modem, or Internet provider)... You can view . No matter what brand of router you have, turn on the power and connect to the Internet. Also, connect antennas if they are detachable.
Immediately after turning on the router, it will start broadcasting the Wi-Fi network. If the router is new, then the network will have a standard name. Something like: "Asus", "Keenetic-7534", or "TP-LINK_0919". It all depends on what kind of router you have. The network will be without a password.
If the network that your router starts to distribute has some non-standard name, or is password protected, then you need to reset the settings and then continue. You can reset the settings by holding down the RESET button on the router itself for 10 seconds. Here are the instructions for.
We take our tablet or phone, go to the settings, to the Wi-Fi tab, and select our network in the list of available networks. We connect to it. It should be without a password. If a password request appears, then we reset the settings (see above). In some cases, the code for connecting to the network is indicated on the bottom of the router.

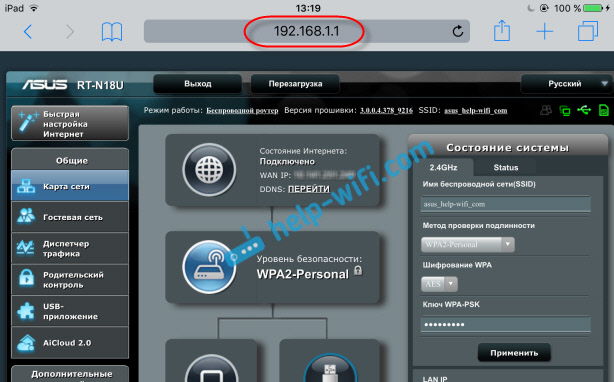
Next, on your tablet or smartphone, open any browser (Opera, Chrome, Safari), v address bar dialing the address 192.168.1.1 , or 192.168.0.1 and go over it. You can see the address of your router on the sticker, which is usually located on the bottom of the device itself.
Depending on the router, you can go directly to the settings, or a window will appear asking for a username and password. Typically, the default is admin and admin... We indicate them and get into the settings. You can look universal.

If you did everything correctly, you will be taken to the settings of your router. I went to the Tp-Link dashboard without any problems.

An important point when setting up a router over a Wi-Fi network
During the setup process, you will change different parameters, including Wi-Fi network settings. Basically, this is the network name and password. So, when you change the name of your Wi-Fi network, and set a password, then after saving the settings and restarting the router, there may be problems with connecting your tablet or smartphone (from which you configure) to your Wi-Fi network.
In any case, you will need to manually reconnect the device to your network. And if this does not work, some errors like "failed to connect" will appear, then you just need to delete the network on your mobile device and reconnect to it.
On iPad, or iPhone, just click on the desired network, and select "forget this network".

On Android devices click on the network we need, and select "Delete network".

After that, connect to your network by specifying set password.
When you change parameters wireless network in the router settings, you will need to adjust the parameters on all connected devices.
You can configure the router from a tablet or the same smartphone without any problems. It's as easy as configuring using a computer. Ask questions and share tips in the comments!
Installing the router using a personal computer is not very difficult, despite the fact that massive instructions are usually supplied with the router, which explain each step in an intelligible language. However, there are situations when neither stationary computer, there was no laptop or netbook, let alone a specialist, but there is a router and a persistent need to use it right now.
Due to the existence of this problem and the fact that it sometimes really causes inconvenience, this article will explain in detail and consistently how to set up a Wi-Fi router without having a personal computer at hand. V this case it will be necessary to have a smartphone or tablet on the Android, iOS system, or Windows Phone, and of course the router itself.

If you decide to configure your router using a mobile device, then first of all you will need the router itself, as well as any mobile device with which you can connect to the network. In addition, an Internet cable from the provider must be laid into the apartment (or house), that is, there must be an Internet connection.
you can use different variants routers and mobile devices, in this case we will consider examples router Tp-Link WR-841N, and tablet ASUS-MeMO Pad FHD10, based on the Android operating system.

On a note! It is recommended to check in advance how they connect to the network, for example by trying to connect to a free WI-FI point at some point of public catering. So you will get rid of problems with the establishment of internal problems of the mobile device, which you can confuse, for example, with the problems of the router itself.
Speaking about the router itself, you can also choose any model that suits you, it may not necessarily be Tp-Link. The most common and well-known models are considered to be such manufacturers as Upvel, Zyxel, D-LINK and others. They differ from each other for an ordinary user mainly in control panels.


Second step. Configuring the Router Using a Tablet

Initially, according to the factory settings, there is no protection on Wi-Fi and your point is actually unprotected from anything. Thus, you can connect your mobile device (in this case, the example is used tablet computer) to the Wi-Fi point with complete impunity, which is what you need to use.

So you've connected your mobile device to your router. Next, you need to configure it correctly.
Router settings through a browser on a mobile phone

Thus, you find yourself in the settings menu of your router. Half of the way is covered, there are still the same.
Third step. Setting Internet Options
From the very beginning, you must configure the router so that it is correctly associated with your Internet provider, that is, so that there are no further problems with connecting to the Internet and distributing Wi-Fi. To accomplish this task, you must know a number of parameters that the Internet provider, along with all the documents, had to transfer to you. First of all, such data includes the technology of the connection itself (Static (static), dynamic IP, PPPoE, PPTP, or L2TP), and thus, knowing how the connection works, the parameters of the router themselves. This information should be in the documentation supplied by the provider, but if it is not there, then you can check it with technical support... In this case, it should be clarified whether the supplier is binding by MAC address.

Advice! If your ISP binds by MAC address, it is recommended that you contact that provider and ask them to bind your Internet to the MAC address of your router. The very same address can be found on the sticker underneath the router.
This is the most important aspect when configuring a router. If you do not take it into account, then although your devices will formally connect to the network, there will be no Internet itself.

These settings have a huge impact on the device and are, in fact, the core of its work, so give them worthy attention.
Fourth step. Setting up a Wi-Fi connection

Fifth step. Setting a password for a wireless network

Sixth step. Change access password
Now you need to change the standard username and password (those that are admin / admin) used when entering the settings menu in order to close access to the router settings menu for unauthorized people.

When the reboot is complete, the mobile device will most likely give an error about connecting to this address (meaning IP: 192.168.1.1). There is nothing to worry about: the point is that the device was disconnected from the router, but did not reconnect to it automatically, and in the future it will no longer connect in this way, due to the fact that you set a password for this network connection, and when the device was rebooted - protection took effect.
Therefore, in order to be able to work on the Internet, you will need to enter a password each time before connecting to the network.
To do this:

If everything goes smoothly, then everything is in order, and most likely there will be no additional connection problems. This means that in this case the provider connects using the "Automatic IP", and thus the router sets all the parameters on its own. In this case, at this stage, you can already connect to the Internet and work.
However, there is another option: in some cases, providers use a connection such as Layer 2 Tuneling Protocol (L2TP), Point to Point Tuneling Protocol (PPTP), static IP, or Point to point protocol over Ethernet (PPPoE) (used by providers such as Beeline , or dom.ru) in this case, sometimes you have to carry out manual setting a number of parameters.
Conclusion

Configuring the router without a personal computer using modern smartphone or a tablet is not such a problem, since the operating systems that modern mobile devices run on are no different from classic desktop operating systems. Of course, it is best to use a tablet, not a mobile phone, since it is very difficult to see small text on a small screen, but technically, the above operations can be performed on any device that supports Android, iOS or Windows Phone.
Video - How to set up a router without a computer
For a very long time, I was going to write this instruction, but it still didn't work out. And now, the long-awaited moment has finally come.
In this article, I will tell you, and I will show everything in detail in the pictures, how to set up a Wi-Fi router without a computer. Having only the router and tablet itself. Well, or a smartphone. Moreover, it does not matter which operating system your tablet (smartphone) works. It can be Android, iOS, or Windows Phone. Can be configured from iPad, or iPhone.
I was very often asked in the comments if it is possible to set up a router with only a phone or tablet. What to do if the house does not have a computer, laptop, netbook, etc. Yes, and it is not difficult to imagine a case when you do not have a computer, but on the other hand, there are many mobile devices that can connect to the Internet via Wi-Fi. And you decided to buy a router to distribute the Internet to your devices.
But, here a problem arises: “How can I configure this router if I do not have a laptop. And there is, for example, only a tablet. Where can I find instructions, and is it possible to do it at all? " Yes, you can. I'll tell you now. You can, of course, borrow a laptop, for example from friends, and carry out the setup according to this instruction. "". But, this is not at all necessary.
What do we need?
We need the router itself, and some kind of mobile device that can connect to a wireless network. From which we will carry out the setting. Well, and the Internet should be in your house, I think this is understandable.
I checked everything and everything works. The whole process, I will show using the example of the same router Tp-Link WR841N, and tablet ASUS MeMO Pad FHD 10 which runs on Android. You may have another device, such as a smartphone. It's just much more convenient on the tablet, due to the larger screen.
As for the router itself, it can be anything, not necessarily Tp-Link. If you have, for example, Asus, D-Link, ZyXEL, etc., then only the control panel will be different. And so, in general, everything will be the same as in this manual.
Preparation: connecting the router
First of all, I advise you to do full reset settings on your router. It doesn't matter if it is new from the store, or has already worked somewhere, the settings need to be cleared. Perhaps it has already been configured, and we do not need any old settings. Because of them, many problems can arise. Therefore, we look at the article ““, and do as it says there. Made? Great, let's continue. If something did not work out, we continue in the same way, let's hope that there are no settings that we do not need.
We fasten the antennas to the router (if removable), then plug in the power cord and plug it in. We connect the network cable, the Internet to the blue WAN connector. Which provider has brought to your house (it would be nice to be sure that the Internet is working and paid. Otherwise, during the setup process, problems may arise, and you will think that the router or the way of setting is to blame for everything).
Plugged in, the indicators blinked, everything is fine. If after plugging into the network, the indicators on the router did not light up, then it is possible that it is turned off by a button, which may be on the case of the router itself. Check it out.
Now we take in our hands a tablet, a smartphone, a phone (what do you have there), and proceed to the next point of our instruction.
Getting started configuring the router from the tablet
By default, Wi-Fi protection is not set and your network is open. Now we will connect a tablet to it (this is in my case, when I continue to write a tablet, I will have to enter the device from which we are setting up).
Go to settings network connections (we need to turn on wifi).
Here, attention! It will have a standard name and will be open source. It is important to choose exactly our network. If in doubt, just unplug your router. (turn off and turn on Wi-Fi on the device itself) and see if the network goes down. If so, then this is your network, we select it.
A window will appear. Just press Connect.
If all is well, the status will appear next to the network “ Connected“, And an icon with network divisions will appear at the top.
That's it, our tablet is connected to our wireless network. You can proceed to the settings.
Configuring the router through the browser on the tablet
We need to launch any browser. It definitely is on your device. It can be Google Chrome, or some other standard one.
In the browser, click with your finger on the address bar and enter the IP address of our router. Usually this 192.168.1.1 , or 192.168.0.1 ... You can see this address, and the standard username / password, on the bottom of your router. They should be listed there.
So, we type this address in the browser, on the tablet, and press the button Go to(open, etc.).
A window will appear asking for a username and password. Enter the standard ones, usually admin and admin, and click To come in.
So we got into the settings of our new router. Half of the case, already done.
Setting parameters for connecting to the Internet
First of all, we need to configure the router to work with your ISP. So that he can connect to the Internet and distribute it via Wi-Fi. To do this, we need to know the parameters that your provider gave you. You need to know the technology he uses (Static IP, Dynamic IP, PPPoE, L2TP), and already depending on the technology, the required parameters. All these data, you can check with the provider's support. At the same time, check if the provider makes a binding by MAC address.
Attention! If the provider binds to the MAC address, then you need to call your provider's support and ask to bind the Internet to the MAC address of the router. You can see the MAC address of the router on the bottom, on the sticker.
This is the most important point. If you make a mistake here, then your devices will be.
These parameters must be set on the tab Network – WAN... Against WAN Connection Type choose the required technology. And already proceeding from a certain technology, we set all the necessary parameters: name, login, static IP, or DNS.
Then, when all the settings are specified and checked, press the button Save to save the settings.
Pay special attention to the settings I wrote about above. As I said, they are the most important.
Wi-Fi setup the network
Opposite point Wireless Network Name, set the name of your Wi-Fi network (write only in English letters, numbers are possible)... This name will be displayed on all devices.
Against Region, indicate the country where you live.
If a window appears, then just click Ok.
Installing protection on the wireless network
We open the item Wireless – Wireless Security.
We choose WPA / WPA2 - Personal (Recommended).
Opposite point PSK Password create and write down a password. It will be used to connect to your Wi-Fi. Use English letters and numbers. Make a password of at least 8 characters. Stick to the case of the letters, it matters.
Be sure to write down the password on a piece of paper and put it in a safe place so as not to forget. Otherwise, you will have to reset all settings and configure again.
Changing the password for access to the settings
We need to change the default admin and admin, which are used to enter the router settings. So that no one but us can access the settings.
Go to the tab System Tools – Password.
Set a standard username and password. And below, ask your own, new data. I left the username admin, here's the password, I came up with my own.
Also write down this password so as not to forget.
After pressing the button Save, a window will appear again asking for a username and password. It is necessary to indicate already new data (which you mentioned above), and press the button To come in.
We will get back to the control panel.
The setup is almost complete. It remains only to reboot our router.
To do this, go to the menu item System Tools – Reboot, and click on the “ Reboot“.
The reboot status will go.
After the reboot process is over, an error will most likely appear on the tablet that it is impossible to open the address 192.168.1.1 ... This is normal. It's just that our tablet will disconnect from the router, but it will not be able to connect automatically. (in the future, it will connect automatically)... Since we installed protection on the network, and after the reboot, it has already started working.
It is necessary to reconnect the tablet to our network by entering the password. So that you can already use the Internet.
To do this, open the panel again. quick access to the settings, and click on the network settings icon.
For example, or may appear. I also wrote about this.
Afterword
It turned out to be a huge article, a lot of screenshots, but in no other way. I tried to make the article as clear and simple as possible.
As you can see, you can configure the router without a computer, but simply with mobile phone, or a tablet. I think that even from the TV it can be set up. And this is not difficult. The main thing is to follow the instructions and check the settings that you indicate, so that later there would be no different problems.
If you have any questions, comments, or wishes, I will gladly listen to them in the comments!
Good day.
So that you can organize a wireless Wi-Fi network at home and give everyone access to the Internet mobile devices(laptops, tablets, phones, etc.) - you need a router (even many novice users are already aware of this). True, not everyone decides to connect it and configure it on their own ...
In fact, the majority can do it (I do not take into account the exceptional cases when an Internet provider creates such a "jungle" with its own parameters for accessing the Internet ...). In this article I will try to answer all the most FAQ that I heard (and can hear) when connecting and setting up Wi-Fi router... So let's get started ...
1) What kind of router do I need, how to choose it?
Perhaps this is the first question that users who want to organize a wireless Wi-Fi network at home ask themselves. I would start this question with a simple and important point: what services does your Internet provider provide (IP telephony or Internet TV), what Internet speed do you expect (5-10-50 Mbps?), And for what protocol you are connected to the Internet (for example, now popular: PPTP, PPPoE, L2PT).
Those. the functions of the router will begin to draw by themselves ... In general, this topic is quite extensive, therefore, I recommend that you familiarize yourself with one of my articles:

search and selection of a router for home -
2) How to connect a router to a computer?
As a rule, a power supply unit and a network cable for connecting to a PC are included with the router itself (see Fig. 1).
By the way, please note that on the back of the router there are several jacks for connecting a network cable: one WAN port and 4 LAN ( the number of ports depends on the router model. In the most common home routers, the configuration is as in Fig. 2).
Rice. 2. Typical rear view of the router (TP Link).
An Internet cable from the provider (which was most likely connected to the PC's network card earlier) must be connected to the blue port of the router (WAN).
With the cable that comes with the router, you need to connect the computer's network card (where the provider's Internet cable was previously connected) to one of the LAN ports of the router (see Fig. 2 - yellow ports). By the way, in this way you can connect several more computers.
At an important moment! If you do not have a computer, you can connect the port of the router with a LAN cable with a laptop (netbook). The fact is that initial setup It is better (and in some cases, otherwise impossible) to carry out a router via a wired connection. After specifying all the basic parameters (configure wireless connection Wi-Fi) - then the network cable can be disconnected from the laptop, and then work via Wi-Fi.
As a rule, there are no questions about connecting cables and power supplies. We will assume that your device is connected, and the LEDs on it began to blink :).
3) How to enter the router settings?
This is probably the key question of the article. In most cases, this is done quite simply, but sometimes ... Let's look at the whole process in order.
By default, each router model has its own address for entering the settings (as well as login and password). In most cases, it is the same: http://192.168.1.1/ however, there are exceptions. Here are a few models:
- Asus - http://192.168.1.1 (Login: admin, Password: admin (or empty field));
- ZyXEL Keenetic - http://192.168.1.1 (Login: admin, Password: 1234);
- D-LINK - http://192.168.0.1 (Login: admin, Password: admin);
- TRENDnet - http://192.168.10.1 (Login: admin, Password: admin).
At an important moment! It is impossible to say with 100% accuracy what address, password and login your device will have (even despite the stamps I mentioned above). But in the documentation for your router, this information is necessarily indicated (most likely, on the first or last page of the user manual).
Rice. 3. Entering a username and password to access the settings of the router.
For those who failed to enter the settings of the router, there is a good article with the reasons discussed (why this could happen). I recommend using the tips, link to the article below.

How to log in at 192.168.1.1? Why does not it come in, the main reasons are
How to enter the Wi-Fi router settings (step by step) -
4) How to set up an Internet connection in a Wi-Fi router
Before describing these or those settings, a small footnote should be made here:
- First, even routers from one lineup can be with different firmware ( different versions). The settings menu depends on the firmware, i.e. what you will see when you go to the settings address (192.168.1.1). The language of the settings also depends on the firmware. In my example below, I will show the settings of a popular router model - TP-Link TL-WR740N (the settings are in English, but it's not so difficult to figure them out. Of course, it's even easier to set up in Russian).
- The router settings will depend on the network organization of your Internet provider. To configure the router, you need information on the connection (login, password, IP addresses, connection type, etc.), usually all that is needed is contained in the Internet connection agreement.
- For the above reasons - it is impossible to give universal instructions suitable for all occasions ...
Different internet providers different type connections, for example in Megaline, ID-Net, TTK, MTS, etc. PPPoE connection is used (I would call it the most popular). Plus, it provides a higher speed.
At PPPoE connection to access the Internet, you need to know the password and login. Sometimes (like in MTS) PPPoE + Static Local is used: access to the Internet will be provided, after entering the password and login for access, the local network is configured separately - you will need: IP address, mask, gateway.
Required settings (for example PPPoE, see Fig. 4):
- You need to open the "Network / WAN" section;
- WAN Connection Type - indicate the type of connection, in this case PPPoE;
- PPPoE Connection: Username - specify the login for accessing the Internet (specified in your agreement with the Internet provider);
- PPPoE Connection: Password - password (similar);
- Secondary Connection - here either we do not specify anything (Disabled), or, for example, as in MTS, we specify Static IP (depending on the organization of your network). Usually, this setting item affects access to local network your internet service provider. If you don't need it, you don't have to worry too much;
- Connect on Demand - establish an Internet connection as needed, for example, if the user turned to the Internet browser and requests a page on the Internet. By the way, please note that there is a column below Max idle Time - this is the time after which the router (if it is idle) will be disconnected from the Internet.
- Connect Automatically - connect to the Internet automatically. In my opinion, optimal parameter, and you need to choose it ...
- Connect Manually - manually connect to the Internet (inconvenient ...). Although some users, for example, if limited traffic - it is quite possible that given type will be the most optimal, allowing them to control the traffic limit and not go into negative territory.

Rice. 4. Configuring PPPoE connection (MTS, TTK, etc.)
It is also worth paying attention to the Advanced tab - in it you can set DNS (they are sometimes necessary).

Rice. 5. Advanced tab in TP Link router
One more important point - many ISPs bind your MAC address network card and do not allow access to the Internet if the MAC address has changed ( approx. each network board your unique MAC address).
Modern routers can easily emulate the desired MAC address. To do this, you need to open the tab Network / MAC Clone and press the button Clone MAC Address.
Alternatively, you can tell your new MAC address to your ISP and they will unblock it.
Note. The MAC address looks like this line: 94-0C-6D-4B-99-2F (see Figure 6).

Rice. 6. MAC address
By the way, for example in “ Billine»The type of connection is not PPPoE, a L2TP... The setup itself is done in the same way, but with some caveats:
- Wan Connection Type - the type of connection must be selected L2TP;
- Username, Password - enter the data provided by your internet provider;
- Server IP-address - tp.internet.beeline.ru;
- save the settings (the router must reboot).

Rice. 7. Configuring L2TP for Billine ...
Note. Actually, after the settings entered and the router rebooted (if you did everything correctly and entered exactly the data that you need), the Internet should appear in your laptop (computer), which you connected via a network cable! If this is the case, it remains to be done little, to set up a wireless Wi-Fi network. In the next step, we will do this ...
5) How to set up a wireless Wi-Fi network in a router
Setting up a wireless Wi-Fi network, in most cases, comes down to specifying the network name and password to access it. As an example, I'll show the same router (though I'll take the Russian firmware to show both the Russian and English versions).
First you need to open the Wireless section, see fig. 8. Next, set the following settings:
- Network name - the name that you will see when searching for and connecting to a Wi-Fi network (specify any);
- Region - you can specify "Russia". By the way, many routers don't even have such a parameter;
- Channel width, Channel- you can leave Auto and do not change anything;
- Save the settings.

Rice. 8. Setting up a Wi-Fi wireless network in a TP Link router.
Next, you need to open the tab " Wireless Security". Many people underestimate this point, but if you do not protect the network with a password, then all your neighbors will be able to use it, thereby lowering your network speed.
- Version: you can leave it unchanged and leave automatic;
- Encryption: also automatic;
- The PSK password is the password for accessing your Wi-Fi network. I recommend that you indicate something that is difficult to find with the usual search, or by accidentally guessing (no 12345678!).

Rice. 9. Setting the type of encryption (security).
After saving the settings and rebooting the router, your wireless wifi the network should start working. Now you can set up a connection on a laptop, phone and other devices.
6) How to connect laptop to wireless Wi-Fi networks
As a rule, if the router is configured correctly, there should be no problems with setting up and accessing the network in Windows. And such a connection is made in a couple of minutes, no more ...
First, click on the Wi-Fi icon in the tray next to the clock. In the window with the list of found Wi-Fi networks, select your own and enter the password for connection (see Fig. 10).
Rice. ten. Wi-Fi selection network to connect laptop.
If you entered the network password correctly, the laptop will establish a connection and you can start using the Internet. Actually, this completes the setup. For those who did not succeed, below are some links to typical problems.

Laptop won't connect to Wi-Fi (can't find wireless networks, no available connections) -

Wi-Fi problems in Windows 10: network without internet access -
Wireless networks are so ingrained in our Everyday life that many people already find it difficult to imagine it without Wi-Fi networks. This standard is utilized in almost all devices - from personal computers and ending with video surveillance systems. Now many in the family have their own personal computer as well as a smartphone, eBook and other gadgets that depend on the Internet. Therefore, Wi-Fi routers or, as some call them, routers nowadays are available in almost every apartment.
With the development of IT technologies, routers can be configured from any device
Many already know how to configure their Wi-Fi devices, for this it is enough to connect them and the computer to the LAN connectors and perform the settings, according to the manual that almost always comes with the kit. But what can be done if an electronic computer is not at hand? In this article, we will look at how you can set up a router from a phone or tablet when there is no PC or laptop at hand.
Before you start configuring the router, you must, of course, turn it on. We connect the power adapter to an electrical outlet and connect the main Internet cable to the WAN router connector, usually it is highlighted in blue.
Next, you need to reset the device settings to the factory settings. It doesn't matter if you bought a new one in a store or have already used it before, you need to do this, because if it was already connected and configured, then parameters that are not suitable for your network could be saved on it. To reset the settings, you need to find a small hole in the back of the device, next to which there will be an inscription "Reset", inside which there is a button. Take something sharp, like a needle or pin, and press and hold this button for a while. After about 10 seconds, the lights on the router should blink, and it will reboot to restore the factory settings.
We connect the phone to the router
If you reset the default parameters, then the password for the Wi-Fi network of your device will not be available, it will be publicly available. Go to your phone's settings, turn on Wi-Fi and find your network in the list of wireless networks. It can have a generic name that includes the name of the manufacturer of the device, and the network must have the best signal strength. If you doubt that this is exactly the network of your router, then try turning off and on the device, while on the phone your network should disappear from the list and then reappear. Click on "connect", and if the connection is successful, the network status will be displayed at the top of the screen of your gadget in the form of an icon notifying that Wi-Fi is active.

Setting up a router
The process of setting up the device via the phone is the same as in the case of using a computer or laptop. To configure, open any web browser installed on your phone, for example, google chrome, and in the address bar enter the address 192.168.0.1 or 192.168.1.1, standard for all gadgets, click on the "Go" button. In the window that opens, 2 empty fields will appear, where we will need to specify the login and code to access the admin panel of the router. Since we dropped all the settings to standard, then these data will be standard, most often the specified username is admin and the password is admin. If these data do not fit, look at the bottom of the device itself or in the instructions, all this should be written there. When you enter this information, you should be taken to the router's web interface itself.

Actually, setting up a router itself consists of three steps.
Setting up an internet connection
The main step is to specify the parameters of your provider; in the admin panel of the router, these settings are most often performed in the WAN tab. Here you need to specify the type of connection to the World Wide Web (for example, the most commonly used PPPoE in Russia), as well as the username and password of the provider. This login pair with a password was given to you when you connected. Try to find your agreement, which was issued to you when you connected to the Internet, everything should be written in it. After specifying these settings, save them. You can also try performing an automatic step by step setup device, some devices can do everything automatically, as well as determine the type of network through which your router connects to the provider. In this case, you will only need to specify your username and password.

Configuring Wi-Fi
If you do not want strangers to use your wireless network, thereby cutting down your Internet connection speed, you can configure Wi-Fi by setting a password for it. Then access to global network only those to whom you tell this password will be able to get through your router.

Go to the Wireless section of the admin panel, and in the Wireless Network Name line, specify the name for your wireless network. By specifying the name of the Wi-Fi network, it will be easier for you to navigate when connecting other devices. Next, go to the Wireless Security tab and specify the security settings. Select the recommended WPA / WPA2 as the security type, and in the Password field, enter your passcode with at least eight characters. Do not come up too complex password, because in the future, you may have to enter it on your other gadgets, and this will create unnecessary difficulties for you when connecting.

Change the password for the admin panel
So that no one can change your options, even with access to Wi-Fi, you can protect your admin panel by changing the standard login and password pair to your own, more complex ones. Depending on the manufacturer of the router, these settings can be stored in different tabs, for example, System tools, after finding the desired tab, look for the password parameter. Here you need to set your name and password. After the above, the device must be rebooted in order for it to turn on with the new options. After rebooting, open the list of Wi-Fi networks on your phone and find the name of the network that you specified during setup, you will also need to enter your new data. If everything is done correctly, the phone will automatically connect to the Internet, in order to check this, you can try to go to any resource of the global network.

So we learned how you can easily set up a router, even without having a computer or laptop at hand. In general, the setup procedure is almost the same as when using a PC. If you have tried to set up a router from a PC or laptop before, then it will not make it difficult for you to do it from your phone.